 English
  Español
  Français
Kingway
Kingway
Kingway
Kingway
Kingway
Kingway
Kingway
Kingway
Kingway
Kingway
Kingway
Kingway
Kingway
Kingway
Kingway
Kingway
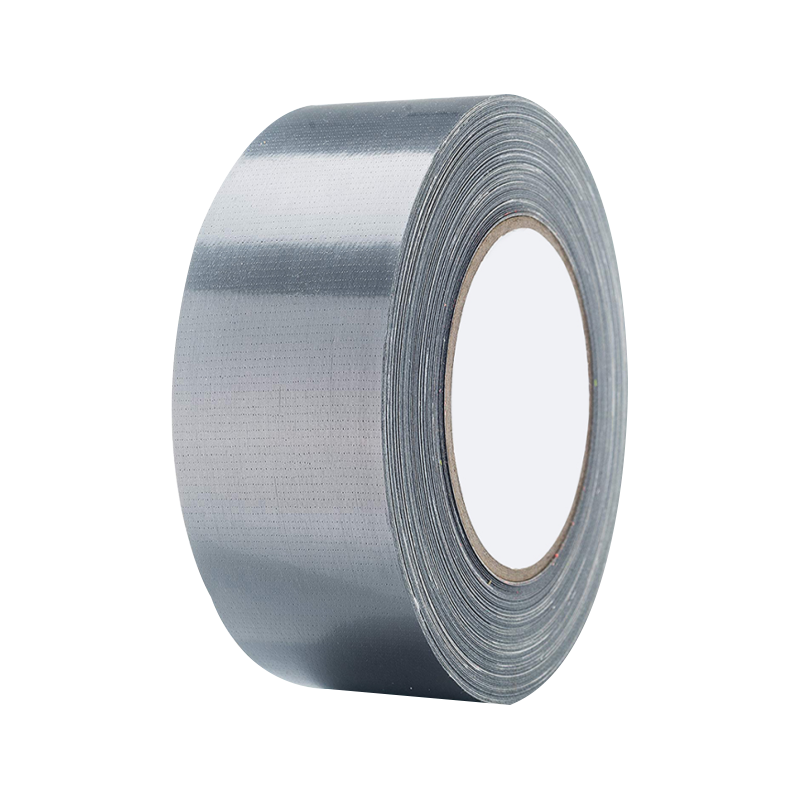
How to Remove Waterproof Duct Tape Residue Without Damaging Paint?
2026-06-25
The Core Truth: You Can Remove Waterproof Duct Tape Residue Without Paint Damage
Yes, it is absolutely possible to remove waterproof duct tape residue from painted surfaces without any damage to the finish. The secret lies in patience, the right solvents, and a progressive approach—starting with the mildest method and escalating only when necessary. Most residue removal tasks take 5 to 15 minutes depending on the tape’s age and exposure. Rushing or using metal scrapers is what causes scratches and dulling, not the adhesive itself.
Waterproof duct tape is engineered for extreme conditions—its adhesive contains rubber, acrylic polymers, and tackifiers that bond aggressively to paint, clear coat, and even metal. Yet with a systematic, chemical‑mechanical strategy, you can restore your surface to a pristine condition without compromising the underlying coating.
Why Waterproof Duct Tape Residue Is So Stubborn
The adhesive used in waterproof duct tape is a pressure‑sensitive adhesive (PSA) that cures and flows over time. When exposed to heat (above 40°C), UV light, or humidity, the polymers cross‑link, creating a bond that can exceed 20 N/cm in peel strength. Additionally, the fabric mesh backing often leaves behind micro‑fibers fused with glue, making solvent‑only removal insufficient.
Manufacturers of waterproof duct tape design these adhesives to resist water and temperature swings, which means they are also resistant to common cleaners. Knowing this chemistry helps you choose the right removal technique—heat softens the resin, while solvents break the polar bonds between the adhesive and the paint’s clear coat.
Essential Tools for Safe Residue Removal
Having the correct tools on hand makes the difference between a 5‑minute job and a damaged panel. Invest in these items before you start – they are inexpensive and reusable.
Must‑Have Equipment
- Plastic scraper or an old credit card – safe for all painted surfaces
- Microfiber cloths (at least 3) – lint‑free and non‑abrasive
- Isopropyl alcohol (70% or higher) – a mild yet effective solvent
- White vinegar diluted 1:1 with water – natural alternative
- WD‑40 or a similar penetrating oil – excellent for old, baked‑on residue
- Automotive‑safe adhesive remover – formulated to be paint‑friendly
- Hair dryer or heat gun – to soften the adhesive prior to peeling
- Warm soapy water (dish soap + water) – for initial cleaning
Never use metal blades, acetone, or paint thinners – these will attack the clear coat and leave permanent haze.
Step‑by‑Step: How to Remove Residue Without Damaging Paint
Step 1 – Test on a Hidden Spot
Always perform a patch test before applying any solvent to the visible area. Dab a small amount of your chosen cleaner onto a inconspicuous section (e.g., door jamb), wait 30 seconds, and wipe. Check for dulling, swelling, or colour change. This simple test takes less than a minute and is your best insurance against irreversible damage.
Step 2 – Clean the Surrounding Area
Wash the tape residue area with warm soapy water to remove dirt, grit, and wax. Dry thoroughly with a clean microfiber cloth. Any abrasive particles left on the surface will scratch the paint during the scraping process.
Step 3 – Apply Heat to Soften the Adhesive
Using a hair dryer on medium setting or a heat gun at a distance of 15–20 cm, warm the tape evenly until it feels hot to the touch (around 60–70°C). Keep the heat source moving continuously – holding it still can bubble the paint. Heat reduces the adhesive’s viscosity, making the tape easier to peel and leaving less residue behind.
Step 4 – Peel the Tape Gently
Starting at one corner, slowly lift the tape using your fingers or a plastic scraper. Pull it back at a 180‑degree angle to minimise stress on the paint. If you encounter strong resistance, reapply heat for another 20 seconds – never yank the tape off, as this can delaminate the clear coat.
Step 5 – Remove the Remaining Glue
Choose a solvent based on the residue’s age:
- Fresh residue (< 24 hours) – soak a cloth with rubbing alcohol or diluted vinegar, press onto the glue for 30–45 seconds, then wipe in a circular motion.
- Old residue (days to weeks) – apply WD‑40 or a commercial adhesive remover, leave for 3–5 minutes to penetrate, then wipe with a clean cloth.
Repeat the application if needed – multiple light applications are safer than one heavy soak.
Step 6 – Scrape Stubborn Spots
For residue that resists wiping, use the plastic scraper at a shallow angle (≈30°) to gently lift the softened glue. Apply light pressure only – if it doesn’t move, apply more solvent and wait. Never scrape dry, as that can leave micro‑scratches.
Step 7 – Clean and Protect
Once all residue is gone, wash the area with soapy water to remove any solvent traces, then dry with a fresh microfiber cloth. Apply a layer of car wax or paint sealant to restore the protective barrier and add shine.
Surface‑Specific Guidelines
Different surfaces react differently to solvents and scraping. Use this reference table to tailor your approach:
| Surface | Recommended Method | Avoid |
| Automotive Paint / Clear Coat | Rubbing alcohol → adhesive remover → plastic scraper | Acetone, metal tools |
| Glass | Warm soapy water, rubbing alcohol, or acetone | Abrasive scrubbers |
| Metal (bare or painted) | Rubbing alcohol or WD‑40 | Harsh acids |
| Painted Interior Walls | Plastic scraper + diluted vinegar | Excessive moisture, strong solvents |
| Vinyl / Plastic Trim | Warm water or isopropyl alcohol (diluted) | Solvent‑heavy removers |
Visual Workflow – Safe Removal Process
Follow this step‑by‑step flowchart to ensure you never miss a critical action:
Frequently Asked Questions
Can I use nail polish remover (acetone) on car paint?
No – never. Acetone dissolves clear coat and can permanently etch the paint. Even brief contact can cause cloudiness and dullness that requires professional buffing to fix.
How long can waterproof duct tape stay on before it damages paint?
Most manufacturers recommend removing tape within 24 hours for best results. After 48–72 hours, the adhesive may start to cross‑link, making removal more difficult. However, with the heat + solvent method, even week‑old tape can be removed safely.
Is vinegar safe for all painted surfaces?
Diluted white vinegar (1:1 with water) is safe for most automotive and household paints. Avoid using it on bare aluminium or delicate clear coats – always test first. Its mild acidity helps break down adhesive without attacking the paint.
What if I see paint colour on the cloth – am I ruining it?
If you notice colour transfer, you are likely removing the clear coat or paint itself. Stop immediately. This means the adhesive has bonded too strongly or you are using too aggressive a solvent. Switch to a gentler method (heat + plastic scraper) and seek professional advice if needed.
Do waterproof duct tape manufacturers provide removal instructions?
Many premium tape manufacturers do include removal guidelines on their packaging or websites. They typically recommend warm soapy water, rubbing alcohol, or a proprietary adhesive remover. Always check the product datasheet if available – it often specifies compatible solvents.
-
How Stretch Films Are Revolutionizing Packaging?
Introduction In recent years, the global packaging industry has witnessed remarkable transformations... -
How to Choose the Right Stretch Wrap Film for Industrial Packaging Needs
Selecting the optimal stretch wrap film is a critical decision in industrial packaging. The right ch... -
How to Choose the Right Packaging Tape for Your Business?
Introduction: A Small Tape with a Big Responsibility In the worlds of logistics, warehousing, and da... -
The Ultimate Guide to Waterproof Duct Tape
What is Waterproof Duct Tape? In modern life and industrial applications, Waterproof Duct Tape is no...
Message Us Right Now!
- Products
- Stretch Film
- BOPP Packing Tape
- Masking Tape
- Duct Tape
- PVC Tape
- Kraft Tape
- Double Side Tape
- Stationery Tape
- Crystal Clear Tape & Super Clear Tape
- NO NOISE Tape & Low Noise Tape
- Other Packaging Products
- Telephone
- +86-527-86881066
- +86-15925605882
- [email protected]
- Address
- NO.6 Hangzhouxi, Sihong Economic Development Zone, Sihong, Suqian 223900, Jiangsu, China


Copyright © Jiangsu Kingway Packaging Technology Co., Ltd.
Zhejiang Kingway Packaging Products Co., Ltd.
All rights reserved.
Wholesale Packaging Material Factory

